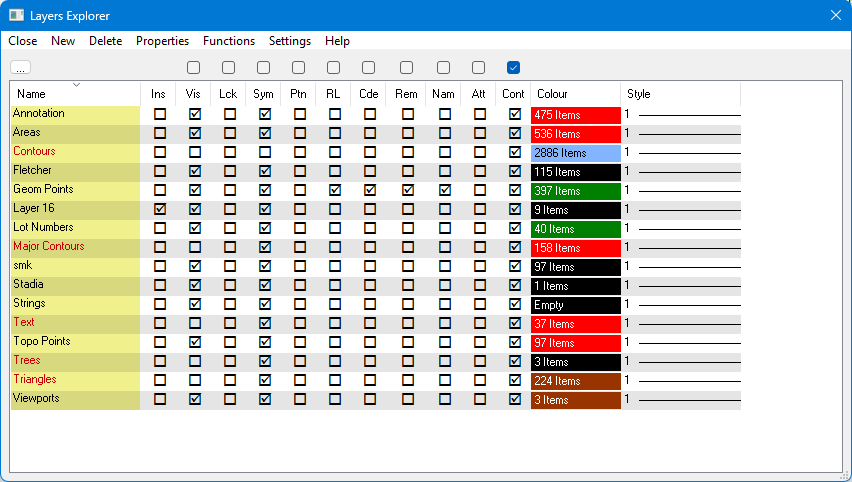
Layers Explorer
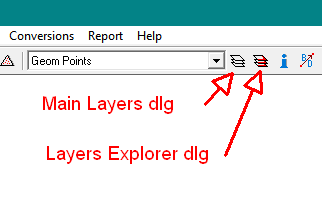
There are two LAYERS dialogs:
1. The main Layers dialog is model and must be closed before any other functions.
2. Layers Explore can remain open all the time.

They are activated by these buttons on the main toolbar.
The Layer Operations dialog Box allows the creation, deletion and editing of layers.
The main list box displays the list of existing layers and allows the user to perform
some operations directly by checking or un-checking the check boxes for each layer.
The layers are displayed with these properties:
- Name
- Ins - Insert layer
- Vis - Layer is visible
- Lck - Layer is Locked - items on this layer cannot be changed or deleted
- Sym - Show layer symbols
- Ptn - Show layer point numbers
- RL - Show layer point heights
- Cde - Show layer point codes
- Col - Line colour
- Sty - Line Style
Note: Only one layer can be the Insert layer.
New
To insert a new layer, press the New button and a dialog box will be displayed to allow entry of all layer Layer Properties
Properties
To Edit a layer, select the layer and press the Properties button and a dialog box will be displayed to allow editing of all the Layer Properties

Sort by Layer
Tick this box to Sort the list by Layer name instead of GroupName/LayerName
Select Objects on Visible Layers Only
Tick this box to all all the Select options (point,Strings,Text) to only select items which are visible.
If this box is unticked, you can select items which are invisible (on invisible layers). This can be dangerous if you are deleting
or editing items as you may delete or edit items you cannot see.
Select --> Ins Layer
Press to Set the currently selected Point/String/Text layer as the Insert Layer
If multiple objects are selected, the first point will be used, or the first string or the first text item.
Usage Tips
- A layer is considered 'selected' when it is highlighted.
- Multiple layers can be selected by holding down the Shift key and clicking on extra layers.
- Multiple Layers - Actions like Properties act on all the selected layers.
- The dialog box can be resized by dragging the bottom right corner.
- Click on any tick box in any column to select that function on or off.
- Click on the column header for any column to sort the list by that column. First click sorts in the upwards direction, next click sorts in the downwards direction.
- The sort column is shown with a yellow background
- Right mouse click in any column to show more complex functions like 'Select All'', or 'Invert Selection'.
IMPORTANT
This dialog interacts with othere disalogs like Point Properties etc.
On the Point Properties dialog, the [...] button starts Layers Explorer if it is not open.
It will start with the Point Layer highlighted.
If you create a New layer or edit a layer(double click), that layer will be selected for the point.
The same type of interaction occurs for Strings and Text.

